When I left my previous employment my colleagues got together and gifted me lovely things. One of them was a Kindle.
I had never used on beforehand, however I had toyed with the idea to try one at some point. I don’t think I’ve ever mentioned it to them. Somebody must have been mind-reading! That or with my constant traveling they thought it would be really handy.
They’re a fantastic bunch.
A new gizmo in a crafty house means something will be put together for its day-to-day handling. It has to, I HAD to.
I really wanted to have a go at quilting. Note, not by hand but with the sewing machine. I’m still too slow and not patient enough by hand.
This also meant drafting a pattern (oh joy!) to make something to my own specifications, which were:
- padded pouch to protect kindle from daily abuse
- closable and cute flap to protect pouch from handbag intruder abuse (namely: pens, crumbs, random bits)
- funky lining, because anything that can be lined should be and with an outrageous colour (this is akin wearing the most scandalous underwear with a casual outfit)
For this project I needed an outer fabric – preferably with a pattern to help with quilting, an inner lining, wading for quilting, a tie and a button of some sort
I diligently traced a line around my Kindle, added 2 cm, added a flap, created an inner flap. Since it had a flap, I drawn the outer front bit without a flap too. This seemed rather simple (the last famous words).

The other requirement I had was to re-use. This is a big theme in my house: To reduce waste. Recycling is great. However it goes hand in hand with either not to use in the first place, or re-use. No energy is wasted to produce and acquire what you’re using again.
Outer Fabric: I have been given by an ex-colleague many upholstery fabric samples that would have gone to the bin otherwise (so good for my new fabric ban resolution). Many sample would fit the bill and I wasn’t feeling guilty of not making the most of the fabric. I actually went sideways to get the most of the pattern.
 |
| Amazing quilting material. No practical for such a small project (the Kindle is only 6 inches/15.24 cm) |
 |
| Badly cut lining, mesmerizing colour. |
Tie and button: There are two boxes at mine that contains wonders. I just need to trifle through them. I keep a lot of little things: take the little ribbons on dresses, tops and skirts that once were used to hold the garment on the hanger. How often are they useful v. coming out at the most inopportune moment? I cut them and keep them for future use. I do the same with the mini safety pins, they’re great to thread little ribbons through hand-made pouches.
My first attempt started very well. Until I finished quilting and stitching together the outer layer. I had also decided to use my overlocker to manage the thickness better. Well… the back of the pouch (with the flap) was about 2cm too short. This meant the kindle had to be really pushed in for the flap to sort of close…not.
I had also padded the flap which meant I was losing precious millimeters there too.
The inner pouch was a tad on the narrow side compared to the outer pouch and stitching the think lining on an overly thick outer pouch would be a nightmare. This is one of the limitation of my machine, you can't force it to stitch very thick fabrics. It bips at you and refuses to stitch. It considers the presser foot to be lifted. It is annoying, however I broke very few needles since I started to use this machine…The Husqvarna engineers had a point (safe but not practical, what were they thinking?).
Winge, winge, winge. Burry half-made pouch under a pile on the table the table and sulk.
***** A week later *****
I left this project untouched for a week. Then a few things happened: first a weekend on my own and a call with my mum. This is when my flat looks like it has just been burgled, bits everywhere due to an hyperactive creative brain. The kitchen was lucky, I decided not to bake as well. Then I had a long Skype call with my mum, and amongst many things we discussed I shared my frustration with such a simple project. I wanted to dump everything. My mum initially thought about salvaging the initial pouch and making it work. I wasn’t happy with this. However she made me consider my project through another angle and had a wonderful idea about the closure (adding bias). I had done this pouch once, I could do it again and correct the initial mistakes.
So I set off again but with a different fabric this time, a light and colourful cotton I used to do a puff-ball skirt. An added bonus about this fabric is that being thinner and more tightly woven, it doesn’t fray half as much as the previous one. I skipped the overlocking stage.
I set off again to draw a pattern: front, back (with flap) and inner flap adding 2 cm between the top and flap.
Choose some good music.
Cut the fabric.
Cut the wading minus the flap.
Pin the inner flap onto the outer back and stitch.
 |
| Make sure all the corners are nicely turned out. Once the lining is in, you won't be able to reach them. |
Interface flap (should have been done before however I didn't anticipate the need to interface the flap)
 |
| Spot the grey interfacing |
 |
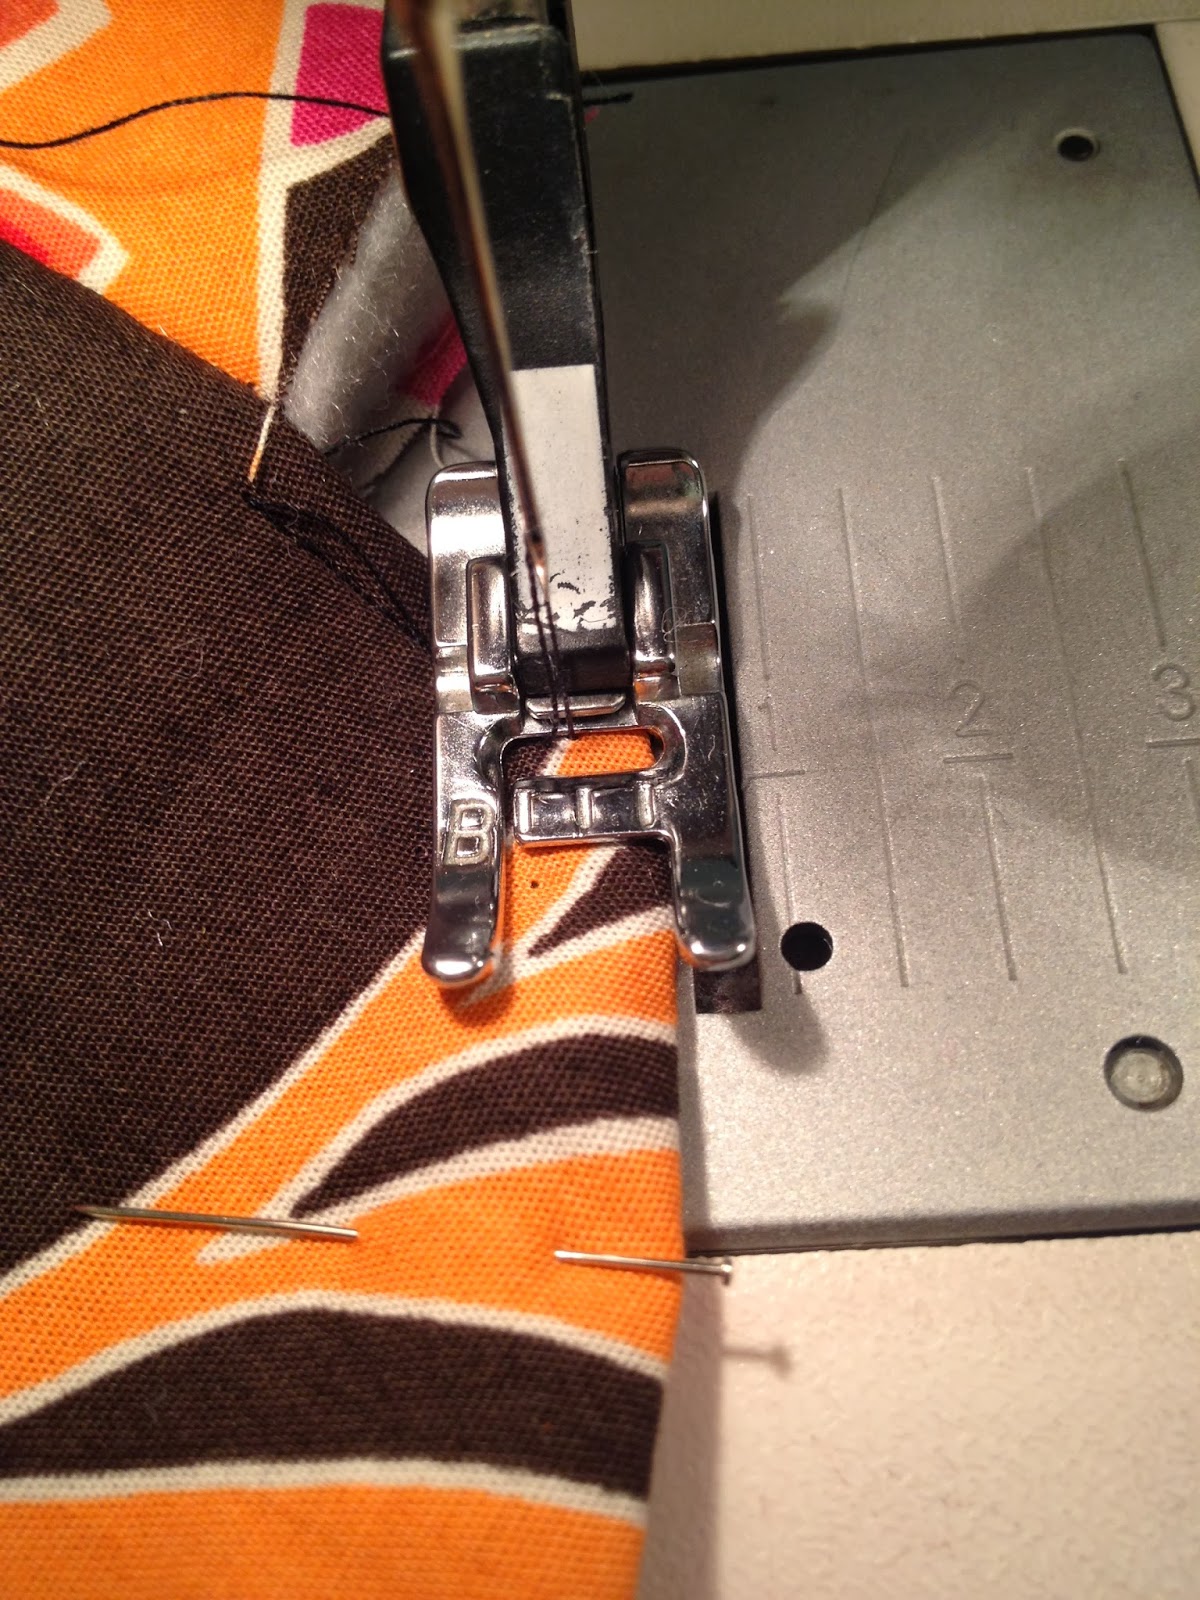
| Quilting in progress, ssshhh |
 |
| View from the back |
Nibble and drink (now is not the time to get the Whisky out ladies!)
Stitch outer layers together, trim the edge.
Slipped Kindle in and close the flap, do a little dance as it fits
Fiddle with attaching the lining.
 |
| View of the pinned bias and inner lining |
So instead I used this method to stitch the lining to the flap. Then I created a length of bias to stitch together nicely the front part. I also made the effort to make the stitching invisible from the front.
Found a button, stitched it making sure the stitches where in the wading and wouldn’t poke through the lining.
Found a ribbon, actually it is a bit of elastic with a colour that fit the fabric and button. I think initially that elastic was part of a box that contained a present (re-use, re-use, re-use). I used a little bit of bias to conceal the unsightly stitching of the elastic. I found they are usually an eye sore.

Et voilà, a protected and funky Kindle.

Kindle and pouch fit nicely in my handbag and have been a constant companion since.
Thank you Tangoe guys!
No comments:
Post a Comment